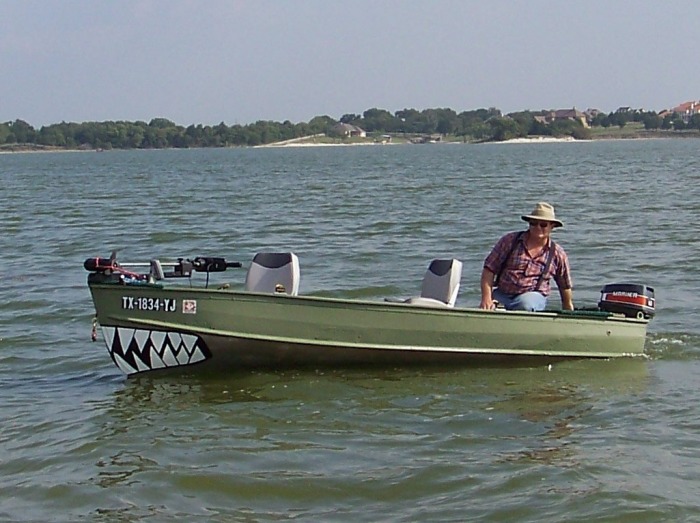
I had a 10' fiberglass boat, and liked the fact that it was easy to launch in small water, but it just wasn't large enough. I needed more room for gear, and something that would handle rougher water; too many trips were being called on account of wind. I found a deal on a Sears 14' semi vee that seemed to fit my needs. The tilt trailer and limited size allow me to put in even where there are no ramps, and this boat handles waves a lot better. Still I wasn't going to be happy until I customized it.
All my changes didn't take place at once,(these pics span almost 3 years) and my original ideas changed as I used it. Sometimes what I thought were the best ideas were better in theory than in practice. A limited budget sometimes made my decisions for me.
The first picture here is right after I brought it home. You can see my old pond-hopper at the top-left. One of the first things I did to my new project was to move the trailer lights to the tops of the guide posts and replace the old trailer wiring.
Clicking on the images should take you to a larger version of the picture.


I named it "The Minnow Bucket" and used it just like it was. It came with a gas motor that had "issues", so I settled for the trolling motor and started fishing. I quickly tired of stepping over seats to go from bow to stern, and started looking at changes made to boats by others. Most people were adding decks at seat level, but after standing on a seat or two I quickly decided that I wanted my floor as low as practical. And yes, that is a Secret Weapon spinnerbait.

It is easier to load and unload where there is no ramp without the gas motor on the boat. I wanted to be able to leave the motor on the trailer without it "walking off" while I was fishing, so bro-in-law helped me weld a tee from square tubing that would fasten inside the winch post. We welded on a bit of chain that allows me to lock the motor to the trailer. I also added a few Bee Ready rod holders I picked up second hand. The Gamefisher is shown here, but I later found a great deal on a 5hp Mariner to replace it.

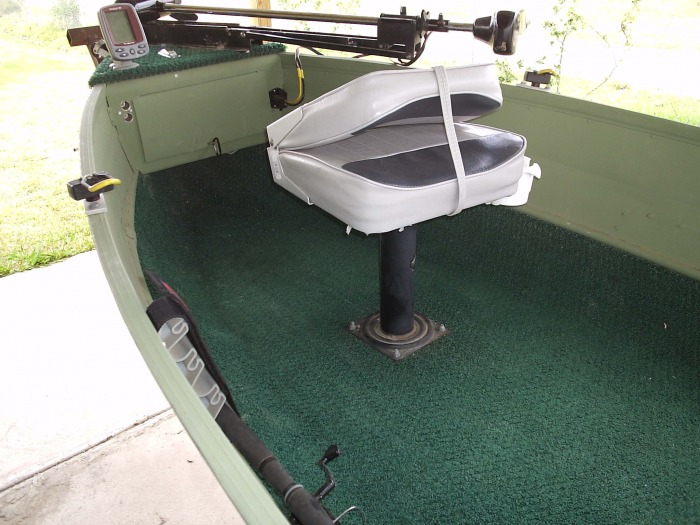
I originally decided to remove the front 3 seats and put a short pedestal on the rear bench seat, with a flat floor from the rear bench forward. I drilled out all of the rivets holding in the seats, and used new rivets to fill the holes. I then had to determine at what level to put the floor. I used a level to make sure the boat wasn't listing to one side, then used the wheel jack to level the boat bow to stern. Then I got out the waterhose and filled the boat to where I wanted the new floor. Then it was just a matter of marking the level of the water on the inside of the hull. It might have been easier to do with a laser level, but that would require me to go buy one!

A trip to my local scrap metal recycling center provided some thin aluminum square tubing. A little creative work with tin snips allowed me to pop-rivet them directly to the hull's support ribs.

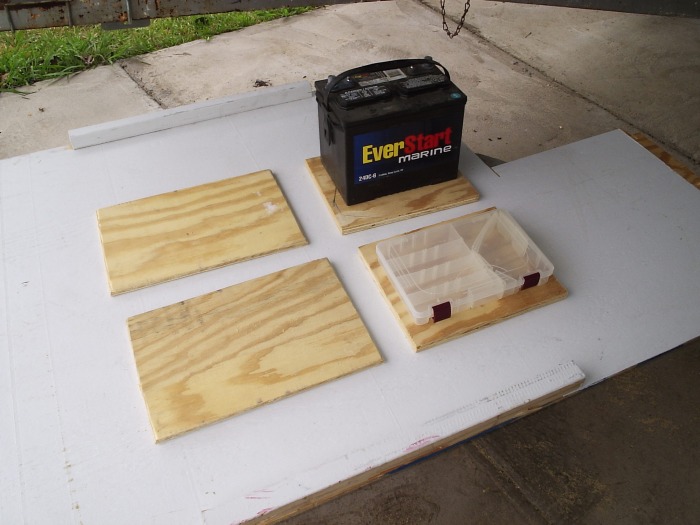
As I worked with the square tubing, I kept thinking about how I would like to have a built-in ice chest/live well. After securing all the tubing, I used cardboard to cut a pattern for my plywood. Cardboard is much easier to cut and repair mistakes on, that way I only have to cut the plywood once.

Before you know it I've been back to the scrap metal place for a section of extension ladder and to Wally World for two conveniently sized ice chests. I will have an ice chest AND a live well! I removed the rear seat and replaced it with a section of ladder(with a couple of rungs removed).

I fitted in flotation foam wherever I could under the deck, which was secured to the boat ribs. All wood received generous coats of fiberglass resin to prevent rotting. I built a wood support for the ice chests to bring their lids just under the top of the cross-brace (read: ladder) and to secure them tightly. I also fitted the ice chest with a drain (it didn't come with one) that allows me to open it to the bilge, and the live well with larger fittings for circulation and overflow. I also cut a board for the bow to mount a trolling motor. I used 1/2 inch plywood. I didn't want to add more weight than necessary, and as you can see I used plenty of support underneath.

I also cut a board to face off the ice chests so that I wouldn't always be losing things in the bilge, and two separate lids/seats to go on top. I know what you are thinking: "Why didn't he paint the darn thing?" Actually, I knew it was just a beat-up old boat, and my concern was functionality, not looks. Later on I wished I had painted it first thing, it would have been easier. Another mistake I made was choice of carpet. Instead of springing for marine carpet, I went with outdoor carpet I found on sale. It's been about 3 years since I put it on, and it is holding up well, but what I didn't consider is that it is NOT hook friendly. Lay a crankbait down on it and you will be digging it out.

Carpet was glued down to the resin-coated wood, and on up the hull to the crease. I used outdoor grade plastic conduit in the crease to run wires up front and as a convenient edging for the carpet. I read somewhere that running trolling motor wires in a conduit with transducer wiring can cause interference, so I ran them separately. The boat is short enough to see a bow-mounted graph from the tiller, so I went with a transom-mounted transducer and a bow-mounted graph.

Here is where it gets creative. I wanted a place I could lock up the graph, camera, or whatever. I still had the removed bench seats, just sitting there needing to be good for something... So I cut a small shelf to rest in the hull's crease and fashioned a glove box out of the old seat aluminum with a sawsall and tin snips.

It doesn't have a hinge, the door has channels cut into it so that it slides within the frame. Raising just one side allows it to be removed completely.

Here is the glove box in place. A socket for the nav. light and the graph are mounted and wired. Peeking out from behind the graph you can see I mounted an anchor pulley.

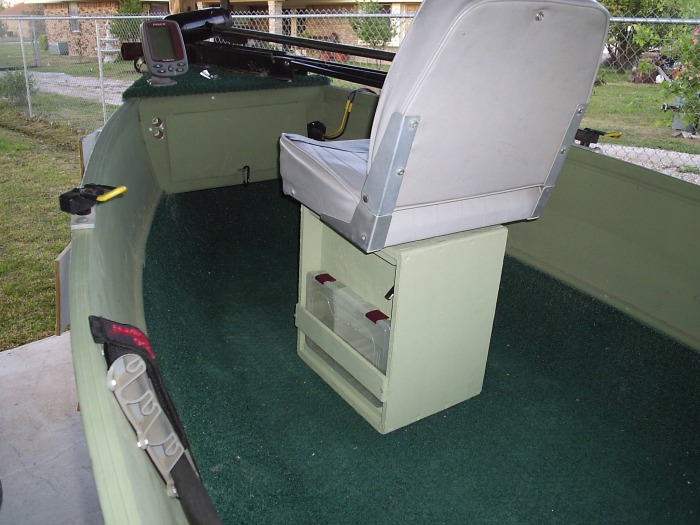
Here it is closed, seat in place on pedestal.

I bolted a 1x4 to the back of the bench seat and screwed hinges to that for the lids. The metal box opposite the fire extinguisher contains fuses and toggle switches for lights, live well, and bilge pumps. There is another base for the pedestal seat just out of sight to the left. There's not room for seats in both bases at once, but if there are three on board I can move the rear seat forward and one can sit on the bench. If I'm alone, I usually leave the rear pedestal out of the boat.

Fuel tank and battery are secured with straps to u-bolts in the plywood, which is secured to boat ribs. Using PVC ball valves allows me to use the one pump to either recirculate live well water, or continuously fill with fresh water and allow to overflow through the black tubing though the hull. At the bottom right of the picture you can see the graph's transducer.

It fished pretty good, just like that, but it seems like I'm always finding something to tinker with on it. I didn't like that metal box for the electrical.

I didn't want to open a door to turn on a switch, but I didn't want a switch broken the first time a tackle box slid against it. The answer was a recessed control panel. Wally World had a silverware drawer divider tray for $1.79. Tanner Electronics had LED toggles for cheap, too. While I was adding, I hid an aoogah horn beside the ice chest and put a horn button on the panel, too.

A little work with the jig saw allows it to sit flush on the face board. Now I needed somewhere else to put the fuse panel and horn relay. I was in a fix-up mood, so I just kept going.

Yes, add sliding doors over the rear storage, paint the boat, and move the fuse panel. Oh, yeah, new (to me) 5hp Mariner. The doors are metal, set in channels that Home Depot sells for edging plywood. You can't see it in these pictures, but there are knobs on each end to grip when sliding the doors. I replaced the transom board while I was at it. There was a stress crack starting to form on the hull just above the transom board, so I beefed it up with pieces of aluminum angle.

I made an aluminum shelf that fit under the new doors. It held the fuse panel, horn relay, and a battery cut-off switch. I wanted to make sure that nothing drained the battery between trips, and this switch is much easier than disconnecting a battery cable. The black bar at the top is my anchor light. Rubber clips make it easy to store away.

I also added two power outlets in the glove box. During the hot summer I like to fish at night, and this is handy for plugging in submersible lights. I almost blocked the camera's view of them, though. Sorry. ;)
I wanted my friends to be able to tell it was me they saw across the lake, something that would make the boat stand out. I think I succeeded. I bought a can of flat black and one of gloss white, and kept painting over mistakes until I was happy with it.

Another angle
Modification Time Again


"Did removing the seats reduce the strength of the hull?"
I'm no engineer, but I'm sure that it did weaken the hull somewhat. This is a 1965 model, and the aluminum is pretty thick. The hull is rated for 15 horsepower, and I am only using a 5hp outboard, and I never take it out in rough conditions. I have not noticed any flexing of the hull while running.If that is a concern for you in whatever boat you are rebuilding, consider leaving at least one seat in the center, or a similar brace incorporated into a live well and/or ice chest. If I were starting over knowing what I know now, I would probably have put the ice chest/live well in the center, with a pedestal seat in the back. When fishing with a partner as it is, the back seater has to handle all live well/cooler duties.
"How high can I put a deck on my boat and keep it stable?"
Everybody's sense of balance is different. A flat bottom boat is more stable than a v-bottom, and the wider a boat is, the more stable. If you think you want a deck at seat level, put on your life vest, put the boat on the water, and walk around on the seats. If it seems too wobbly, then that is too high for your boat. Remember to consider the number of people that will be on board and their height and weight, also. I am very happy with the height of my floor, especially when a Texas thunderstorm seems to come out of nowhere and I'm heading back to the ramp in some choppy water.
My Home Page
Recommended sites:
TinBoats.Net
Secret Weapon Lures
Texas Fishing Forum
Another boat conversion:
The Olive Drab Floater
